Saturday, February 28, 2015

Three Days until the Arizona Trail

Three days until Jan and I plan to start the Arizona Trail.  Just arrived in Sierra Vista, AZ with my parents.  We are spending some time visiting my Grandpa and Grandma here, before Jan flies in and we start hiking.
On the road with my parents, driving to Arizona.
New information about trail conditions pours in.  Jan and I are frantically emailing back and forth.  She’s heard some news from our friend Sirena— she’s from the Arizona Trail Association and a fellow Gossamer Gear Trail Ambassador.  She's got lots of news about the weather for us.

Lots of snow is forecast at high elevations in the Huachuca Mountains in the next two days.  The first 20 miles traverse some of the highest elevations on the whole trail, and are sketchy and steep.  On the other hand, right now the lower elevation section between Oracle and Superior is in bloom.  Jan and I had planned to start at the Mexico border and pass through the Huachuca Mountains our first two days, but that would put us in the worst snow, and we’d likely miss the wildflowers and likely hit that area when it heated up—our original plan looks less than ideal.

With the wildflowers calling us north, and the southern mountains sounding treacherous right now, alternative plans are being considered.  Southbound?  Starting in Superior?  Flipping?

This is a moment when I’m so glad I’m not constrained by a traditional northbound thru hike.  As a section hiker, I have no moral qualms about picking and choosing amongst the various parts of this trail.  In fact, I think it would be wrong for me NOT to make a beeline to see the desert in bloom!  I am relieved that Jan feels the same way too!

But that's not the only uncertainty in our plans.  About my foot—A week and a half ago, I felt a twinge where the stress fracture had been last year.  It made me so nervous, that I stayed off it, resting on our road trip.  Finally, today I went on a short hike with my pack at the base of the Huachacua Mountains with my friend Farwalker, who I met on the PCT.  I was relieved that I had no pain when I was hiking.  My foot felt completely normal on the trail, under the weight of my pack. 
Dayhike today in the Huachuca Mountains, AZ.
But on the car ride back to the hotel, I could feel slight sensations, sort of nervy.  DANG IT!!!  It’s driving me crazy! If it actually hurt, I could call off the hike.  But what does this twinging mean?  Is there something wrong— did I re-injure it when I was doing all those training hikes in the snow with my microspikes—or is this what happens with old injuries?

I am SO SICK of thinking and talking about my darn foot!  I want to leave this injury behind.  But then I remember that having the stress fracture last year gave me the philosophy I have now, and the freedom I have from the constraints of a thru hike.  I am free to go chase flowers.  Because I don’t know how many miles I’ve got in my foot but I’m not going to waste whatever ones I get.
Beauty of the Huachuca Mountains, AZ.
I know I can’t take my ability to hike for granted.  I can’t control what’s going to happen.  I hope my foot will be OK, but I accept that it may not.  I work on contingency plans.  I mentally prepare for having to get off the trail if my foot gives me any indication that this is a serious injury.  I hope with all my heart that my foot will give me some miles on the Arizona Trail.  I want so much to be out on this trail, to experience the joy of hiking and to see the beauty that is so close. 

I don't know where we are starting.  I don't know how my foot will be.  But we are heading out there soon.  And I do know I'm not going to take any of the time I have out there for granted.

Be sure to check out Jan's account of our hike on her blog.

Thursday, February 26, 2015

Beginner's Guide to Going Stoveless

I’ve been backpacking stoveless for several years (including not carrying a stove on 1500 miles on the Pacific Crest Trail last year).  I love the simplicity and speed of no-cook meals.  Many people have asked me how they can go stoveless if they don't have a dehydrator.  This article provides the basics for the weekend backpacker, and focuses on simple meals that use products readily found in supermarkets. 
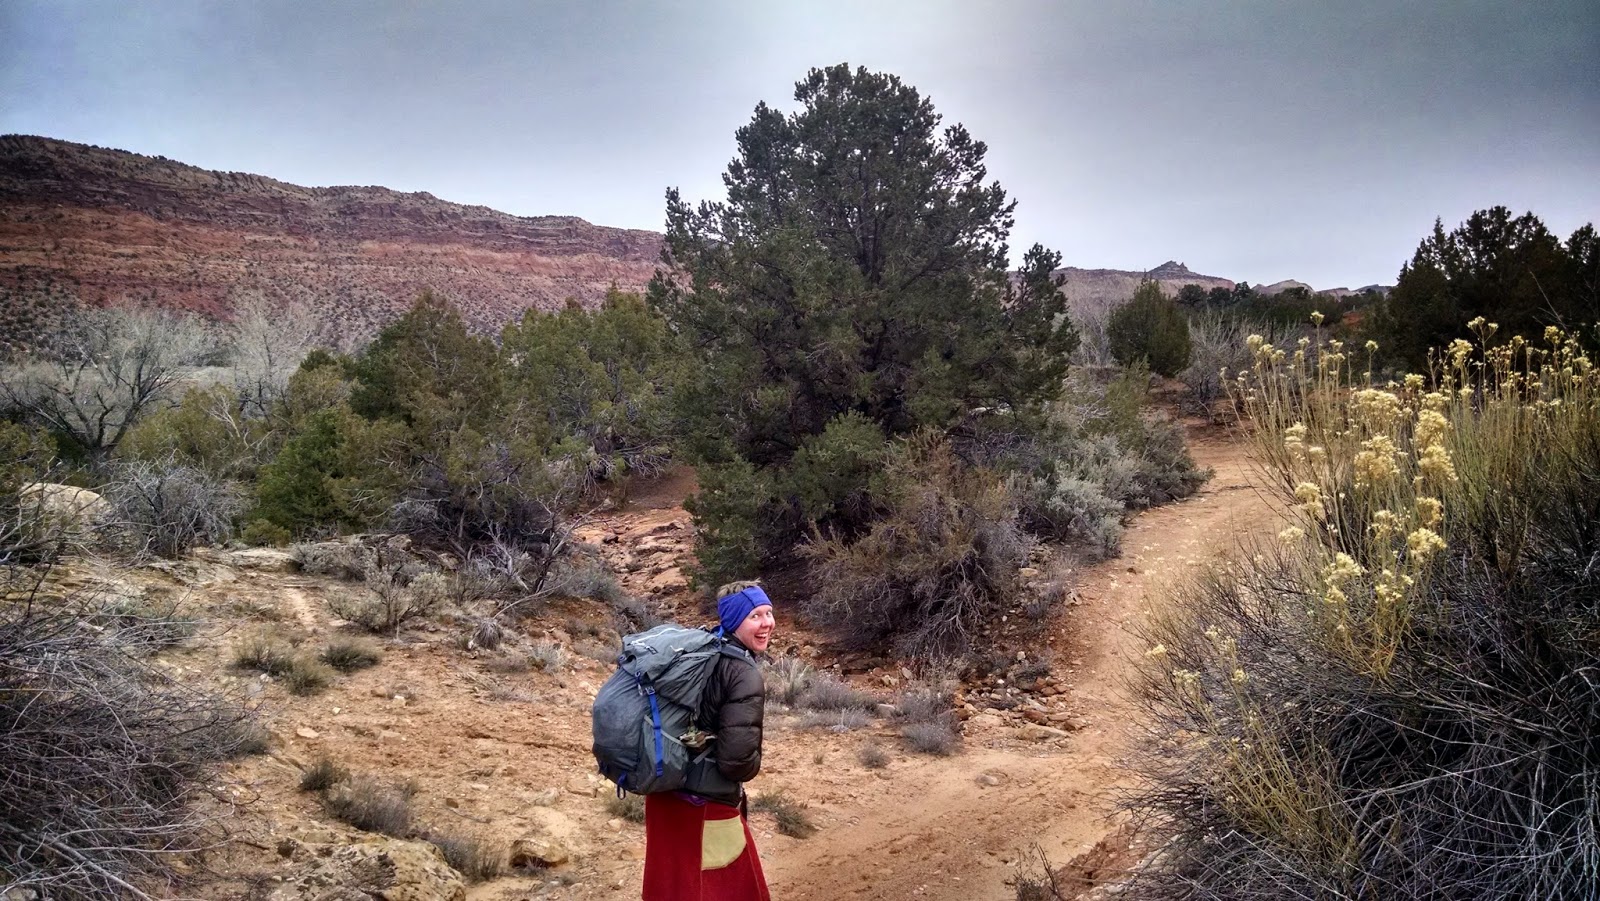
A cold lunch is easy and can be satisfying even on a cold day.
Basic Principles and How to Start:

(1) Transition gradually.  Use a stove for dinner, but skip a hot breakfast.  Try going totally stoveless in summer first to see if it works for you. 

(2) Think about what foods taste good at room temperature.  What do you eat for lunch or at a picnic?  Sandwiches, pasta salad, couscous, wraps are all stoveless staples.

(3) Many backpacking meals rehydrate with cold water given enough time.  Add cold water to meals you already like, only add it 2-3 hours before meal time.  Ramen, soups, chowders, stews, re-fried beans are easy options.

(4) Find substitutes for the ritual of having that hot beverage or spending time cooking.  Try drinking cold flavored drinks like Gatorade or packaged ice tea, or eating something slow that you can savor like instant pudding.
Watching others with their steaming hot beverages can be the biggest challenge. 
Types of no-cook foods
Different no-cook food require a different technique to prepare on the trail.  Carry a mix of these three categories of food: 

(1) Food that can be eaten dry (i.e. that don’t require added water) provide easy and quick calories.  The downside is they can be heavier because of their higher water content.  Still, it is handy to have these in case you are low on water or need to eat immediately.
Examples: tortilla, wraps, cheese, peanut butter, fresh fruits and veggies.
Peanut butter mixed with nutella can be spread on a tortilla, or eaten by the spoonful.
(2) Food that can be eaten instantly after adding water.  The higher water content in these foods keeps you hydrated and tastes filling.  These are lightweight, but can be prepared fast if you are hungry and need to eat quickly.
Examples: cereal with powdered milk, powdered hummus, instant pudding with powdered milk, instant cheesecake.
Mix instant pudding with nido powdered milk at home.  In camp, just add cold water.
(3) Food which requires adding water 2-3 hours before eating.  Most dinners are in this category.
Examples: ramen, instant rice, instant black beans, couscous.

What to do on the trail:
That third category of food can be rehydrated either in either plastic jars with screw top lids (like peanut butter jars) or in ziplock freezer bags (double bagged).  Try both methods and see which works for you.  Plastic jars can be easier to eat out of, but are more bulky.

Package food that requires additional water into individual, pint sized ziplock freezer bags.  Add water directly to the food, double bag it in case the bag leaks, and carry it for 2-4 hours.  An hour before eating, give it a stir to see if it needs more water.
A long spoon helps for eating out of plastic bags.
One trick for cold weather- carry your rehydrating food in your pocket so it gets body heat.  Takes the chill off and seems to rehydrate faster.
The lump below my waist belt is a bag of food rehydrating in the pouch of my hoodie
How do you know if a food will rehydrate in cold water?
Many freeze dried or dehydrated foods that you find in a grocery store will rehydrate in cold water, even if the directions say add boiling water.   Get a selection of pre-packaged foods from the pasta or ethnic section of the grocery store—Fantastic Food brand food (like tabouli and black beans), couscous, ramen, instant rice, and instant potatoes.  Try a small sample of choices at home or work-- add water in the morning, and to find out how they taste at lunchtime.  If they are crunchy or unappealing, you can rescue them in the microwave, and note which ones to bring on your trip.

To make a complete meal- repackage pasta or grains into single-sized serving ziplock bags with any additions like powdered milk, shelf-stable Parmesan cheese, chips, nuts, or dehydrated veggies (which can be found in some grocery stores). On the trail, add cheese, pouch of tuna or chicken, deli meat/ pepperoni, or other toppings.
Salty crackers or chips add crunch to creamy soups.
Easy no-cook meal ideas:

Breakfast
     - granola with powdered milk (nido brand is found in the ethnic isle of walmart)
     - cereal (like special k, grape nuts, shredded wheat) with protein powder
     - carnation instant breakfast
     - cereal bars, poptarts, pastries, bagels, croissants, cinnamon rolls

Lunch
     - fresh meat (pre-cooked bacon, salami, pepperoni)
     - fresh dairy (hard boiled egg, string cheese, mini baby bell cheese, gouda, cheddar cheese, cream cheese packets)
     - fresh bread (tortillas, wraps, naan, french bread, pitas)
     - peanut butter, dried fruit, jelly, honey
     - fresh veggies (avocado, carrots, apples, sugar snap peas, tomato)
A simple wrap of hardboiled eggs, tomato, and cheese.
Dinner
     - ramen, couscous, bulgur wheat, instant potatoes
     - dehydrated soups, stews and chowders (split pea soup, lentil soup, miso soup mixes)
     - meat (jerky, sausage, tuna, chicken or salmon foil packs, single servings spam in foil)
     - frozen burrito or deli sandwich
Add fresh meats and vegetables to meals for extra flavor and texture.
Shopping hints:
    -  Check Big Lots for dehydrated soups or stews.
    -  Walmart’s hispanic food section (usually) has nido milk powder.
    -  Look for cream cheese packets and squeeze packets of hummus in the deli section.
    -  Individually wrapped cheese sticks, baby bell cheese packed in wax, and string cheese are low mess and last a few days even in summer.

Do not be scared to leave your stove at home, and give stoveless meals a try!  You won't miss the weight of the stove and pot, and you may be impressed with the simplicity and speed of this method. Enjoy!

Further reading:

My experience going stoveless
My Food for the PCT
If you do have a dehydrator: Summer Stoveless Favorites and Winter Stoveless Favorites

PMags- Going stoveless- Cold Food for Thought

Recipes for chicken salad wraps
         ...for no cook pudding and desserts

Chef Glenn's Backpacking Recipes- Another great resource for food with stoveless options mixed in

Wednesday, February 25, 2015

Getting Outside with Trail Dames

In January and February, many Trail Dames events are designed especially with new hikers in mind.   I’m always inspired by the women of this group, and feel so good about the chance to help get more women outdoors.
Hiking up Stone Mountain near Atlanta, GA.
Meet and Greets
In town Meet and Greets provide practical information to get everyone--even complete outdoors novices---ready for their first hike. A panel of trip leaders covered how to choose a trip and use Meetup, what to wear and bring, and what to expect while hiking with a group. One of the biggest challenges is getting over the hurdle of going out with a group of new people. So Meet and Greets also provide a chance to meet the the group and see how fun we are.
Talking about what to bring on a hike.
Meetin' and Greetin'
Dayhikes
In winter, dayhikes close to town provide more moderate temperatures compared to the mountains.  I ended up leading trips nearly every free weekend I had while I was in Georgia. I won't be able to do this easily after I leave GA---I won't know the trails and won't have a group of other co-leaders ready to help out. These things take time to build.
Beaver Dam at Lake Russell.
Lake Russell Wildlife Management Area in Georgia.
Botanical Gardens in Athens, GA. Photo by CT.

Beginner backpacking clinic
Demonstrations and activities at a local park provided ample chance to introduce backpacking skills and gear options.  The goal was to send the message that “you can do it” and to help people avoid feeling overwhelmed or fearful, and prevent them from wasting money on gear that is never used.  We also covered how to sort through all the conflicting advice and figure out your own style.

To address common fears in backpacking, we came up with the game of “Fear Charades.”  We made up a list of fears on index cards and handed these out to everyone randomly.  Each person had to act out their assigned fear and say what they’d pack if they had that fear.  Like a zero degree sleeping bag in 50-degree weather (if they are scared of being cold).  After everyone guessed what the fear was, as a group, we brainstormed how to deal with the fear and mitigate risk of any real danger.  People’s creative sides showed through and there were good discussions.

Many people ask whether to get a hammock or tent.  We illustrated tradeoffs in shelters by setting up a hammock and a tent side by side, and discussing pros and cons.
Trying out a hammock for the first time.
The topic of peeing in the woods inevitable brings up laughter.  We encourage discussions because that breaks the ice and puts people more at ease.  In the past, we’d heard stories about people who’d avoid drinking so they wouldn’t have to pee in the woods.  So now we are open in talking about where to go, pros and cons of toilet paper, pee rags and female urination devices.  After one Dame (who was really enthusiastic about being a peer-educator on this topic) returned from going in the woods, she’d boast “ahhh it feels so good to have an empty tank”, and inevitably the other women would head out to go too!
Wearing it proudly.
I was glad to have the chance to spend time with the Dames and to help out on a variety of trips.  Special thanks to all the women who joined us and to my fellow trip leaders-- ya'll are awesome.

Saturday, February 21, 2015

Preparations for the Arizona Trail

Less than two weeks until the Arizona Trail.  Planning and preparations have been different in certain ways but unfortunately similar in other ways compared to last year when I was getting ready for my first long distance hike on the PCT. 

First the differences… 
Instead of asking if I can I bring my hammock, I ask what parts of the trail go through mountains and which are at lower elevations.  Whether I bring a hammock is not up for debate anymore.  I anticipate sleeping on the ground some nights, but I am confident I’ll find some hang sites too.

I don’t spend any time trying to figure out what towns to stop in.  ALL OF THEM.  The questions become  “what time does the diner open for breakfast” and “which restaurants have burgers, ice cream, and fast wifi.”  Priorities are clearly defined.

Minimal time is spent on gear.  Everything that I carried last year on the PCT suited me well, that I see no reason to change.  I do replace things that are worn out  — water containers and water filter.  Gossamer Gear provided me with a new pack when I went to Moab (since I am a Trail Ambassador) and it is shiny and doesn’t smell bad.  Everything else does though.
Exciting new gear-- no holes or funky smells!
I focused my planning efforts much more on water and navigation.  Reading about water on the Arizona Trail scares me.  My friend from the PCT Brian “Arizona” tells me stories about his trip on the AZT and how hard it is to find water.  How the water sources can be dry or thick with scum and how he hiked for miles without any water.   I realize how easy I had it on the PCT.  Navigation was easier too — the PCT was well-marked, Halfmile’s paper maps were super, and I had three different, excellent apps for navigation (Guthook’s Halfmile’s PCT, and eTrails).  On the Arizona Trail, there are no dedicated apps (though this is going to change soon).  Instead, I loaded the GPS tracts on my iphone and downloaded the maps around the trail manually using Gaia GPS.  I’m so relieved I’ll be hiking with Jan.  Two brains will be so helpful for navigating this trail.
GPS tracks for the Arizona Trail and cryptic waypoint labels loaded onto Gaia GPS on my iphone.
Now the similarities…
My training isn’t much different from last year, except that I didn’t have to build up my pack weight since I never stopped carrying my full pack after I got off the PCT.  I go hiking pretty much everyday, carrying my backpack (with all my gear and tire chains to fill in for the weight of food) for 5-7 miles on rugged trails.  I did this more to relax and to be outdoors rather than serious training though.
Training hikes with full pack plus tire chains.
Another thing that has been the same as last year— yesterday while I was out on my daily hike, there was a lot more snow and ice than usual and I wore my microspikes to keep from slipping.  When I got home, I noticed an ache in my foot where the stress fracture happened back in June!  *MAJOR PANIC ENSUED.*  The worst part was that I could not figure out what I’d done wrong.  I’d even taken the tire chains out of my pack to take it easy on the ice.  I thought I’d been doing everything right— not increasing my pack weight or mileage, taking really good care of my body.  The pain wasn’t sharp sore, but it felt like *something.*  Which was enough to freak me out because it hasn’t felt like *anything* for 6 months.  I've done over 700 post-stress fracture miles on the foot with no problems at all.  Until yesterday. 
Ice storm.
I remember that last year, two weeks before I started the PCT, my knee got sore where it had an old overuse injury.  That was just a tendon, and ended up healing before I started the PCT.  But if this is another bone injury... well... that's not going to heal this quick.  You'd think I'd be able to tell what kind of injury I have, after all this!  But shoot I just don't know.  And I don't know WHY!  Maybe it's the combination of microspikes and trailrunners just doesn't work for my feet?  Maybe being totally stressed out makes me more prone to injury?  That’s what my friends suspect it is.  They see how overwhelmed and panicked I’ve been acting this week with the craziness of moving and getting ready for the trail.

I’m staying off the food for now.

Oh how some things never seem to change!

Monday, February 16, 2015

Planning for the Arizona Trail

I’m thrilled to say that I'm heading out to hike for a month on the Arizona Trail, starting in early March.

The Arizona Trail is 800 miles long and runs north-to-south along the length of the state.  While it is a designated National Scenic Trail, I’ve been told (by my friends that have hiked both the PCT and AZT) that the Arizona Trail is much more rugged, requires excellent map and compass skills (because it’s not as well marked), and water sources are more difficult compared to the PCT.  On the other hand, the scenery is going to be totally spectacular and we will hopefully see spring wildflowers.
Overview of the Arizona Trail hike that we are planning.
Because I have limited time for this trip, we are only going to be doing the southern section, starting from the Mexican border.  The trail will take us through the Huachuca, Santa Rita, and Rincon Mountains, into Saguaro National Park and the Catalinas (near Tucson), and then through a long dry stretch before entering the Superstitions (east of Phoenix)

I will be hiking with Jan (Beekeeper), who I met in California last year when I was recovering from my stress fracture.  We both went to the Gossamer Gear Trail Ambassador trip to Moab in January, and then spent a week hiking and camping in Utah.  In Moab, we were fortunate to meet Sirena, who is the liaison for the Arizona Trail Association, and inspired us with her photos of her Arizona Trail hikes. 

Planning, training, and preparations are hectic right now, so it's likely that I will not be doing many blog posts prior to the hike.  As always, you can see my recent photos on Instagram, and I’ve also started a facebook page for this blog.

Tuesday, February 3, 2015

The joys of winter car camping

I am a reluctant car camper.  I usually prefer the solitude and simplicity of backpacking.  But dispersed car camping was perfect for on recent winter trip to Comb Ridge and Cedar Mesa in southeastern Utah.
Car camping in the Valley of the Gods, Utah.
What I want at the end of a satisfying day of hiking is to sleep in my hammock amidst silence and stars, to smell the desert air, to watch the light fade on the horizon.  That is usually only made possible by traveling several miles into the backcountry.
Watching the sunset near our campsite in the Valley of the Gods.
But dispersed car camping on BLM land allowed for this type of experience.  Dispersed camping is camping in previously established sites that are spread out along forest service roads, away from campgrounds.  There are no bathrooms, picnic tables, or water, but it is possible to get miles away from anyone.  And the car is just steps away, ready to head to the next trailhead in the morning.
Walking to a hammock hang site a short ways from the car. Photo by Jan.
In winter, there were few people, so we still maintained a sense of solitude.  I imagine it’d be different during the busy season.  But most people don’t think about camping when it’s this cold.
Our campsite in the Valley of the Gods was totally peaceful.
Fellow Gossamer Gear Trail Ambassador Jan and I enjoyed the advantages of car camping.  We hung out in the warmth of the car in the evenings before I retired to my hammock.  We camped in relatively warm, sheltered spots, and then drove to colder, higher elevation trailheads in the morning.  What an excellent way to spend more time outdoors in winter!
Jan brought her stove and made hot cocoa every evening.  Quite a luxury for me cause I usually am stoveless.
How to find dispersed campsites in southeast Utah
I wasn't too familiar with dispersed camping since I normally just go backpacking.  Here are some tips I learned:

- Find out where to camp on BLM land from the visitor’s center in Blanding or Bluff, the BLM offices, and in hiking books.

- Drive around dirt forest service roads and look for sites where others have previously camped.  There were plenty of such places along Comb Wash, Butler Wash, and in the Valley of the Gods.

- Never camp near water sources.  Wildlife (and backpackers) depend on scarce water, so it’s critical not to contaminate it.

- Several parking areas had “no camping signs.”  Follow these regulations, and also never camp near archeological sites.

- Camp only in already established campsites.  Protect the fragile cryptogamic soils by staying on already trampled and compacted areas. 

- Follow LNT principles and leave your campsite pristine for the next people- pack out all trash including toilet paper and banana peels/ apple cores, dig catholes away from camp, follow all campfire restrictions, and use a stove for cooking.

- Permits were required for some areas.  The ranger station was closed in the off-season (Nov.- late Feb.) so self-registration stations were available and permits were also available at the BLM office in Monticello.
Watching the shadows creep across the vast landscapes.
Special campsite selection tips for hammock hangers
Choosing a warm campsite that is out of the wind is key for staying warm in a hammock.  Pay careful attention to site selection: 

- Cottonwoods are plentiful in washes but are often more breezy.  I avoid these areas in winter because the cold air sinks to the bottom of washes.  Try to find juniper/ pinyon pine forest because they tend to be more sheltered from wind and sites mid-way up hillsides tend to be warmest.

- Try to find trees where you won’t have to break branches to make room for your hammock.  Avoid cutting tree branches because it could damage the trees or create an “unnatural” feel for future campers.

-  Junipers tend to have lots of low branches so I carry rope (bear bag rope) to gently tie back tree branches if I can’t find a site that is big enough to squeeze my hammock into.
Using rope to tie back a branch so I could tuck into this gorgeous site in Valley of the Gods.
Overall, winter was a great time to explore southeastern Utah!  We enjoyed a fantastic week of hiking and camping and can't wait to come back for more adventures.
We're having a great time out here!
Read more about our hiking adventures on Comb Ridge and Cedar Mesa, and check out Jan's trip report on her blog.

Monday, February 2, 2015

Winter hiking in Cedar Mesa, Utah

Cedar Mesa in southeastern Utah has extensive backcountry routes that snake through remote canyons dotted with Ancestral Puebloan ruins.  While spring is the most popular time to visit Cedar Mesa, fellow Gossamer Gear Trail Ambassador Jan and I enjoyed a winter hike in Kane Gulch during January after our Trail Ambassador trip to Moab.  Because elevations are around 6000 feet, temperatures were colder and there was more ice and snow than there had been down at Comb Ridge.
Descending into Kane Gulch.
Kane Gulch was described as an easy introduction to Cedar Mesa.  We did an 11 mile out-and-back hike from Kane Gulch Ranger Station (closed) passed Junction Ruin to Turkey Pen Ruin.
Four layers of hats isn't excessive when it's 16 degrees
The footprints tapered off the further we got from the ranger station, and we didn’t see anyone all day.
South-facing slopes were free of snow.
Jan crossing the ice in her microspikes.
Reflections in ice.
This Jacal structure of unknown function gives Turkey Pen ruin its name.
Near the ruins.
Overall this was a gorgeous hike and I hope to return to Cedar Mesa to explore more of the backcountry.

Tips for winter hiking

- Wear microspikes for traction over ice.  Steep slickrock traverses and boulder scrambles are slippery and more dangerous when wet and icy or snow-covered.

- Carry plenty of water as there was none available even in campgrounds.  Backcountry springs can be frozen into solid sheets of ice.  We had to wait until the afternoon sun had melted the ice to collect water from a spring.

- Practice your routefinding skills.  Trails are more difficult to follow when they are buried in snow.  Check map and compass often.  Both Jan and I downloaded topo maps onto our iPhones which we can use as GPS units without cell-service using various apps (I use Gaia GPS and Jan uses Trimble Outdoors).  We traced our routes so we could always backtrack, and I carried a backup battery since this app uses extra power.

- Be self-sufficient.  There are few if any other hikers out and ranger stations are closed so help is not readily available if you get in trouble.  Wilderness first aid training, hiking with a partner, and carrying a SPOT provide some level of safety, but are not substitutes for maintaining good judgement and being cautious.

- Keep an eye on the weather.  Check weather forecasts and watch the sky. 

More information


BLM-Monticello website

Trails Illustrated Map #706: Grand Gulch, Cedar Mesa Plateau

A Hiking Guide to Cedar Mesa by Peter Francis Tassoni.
Covers more hikes in the region but with shorter descriptions that allow you do more of your own routefinding.  Includes driving directions to trailheads, GPS coordinates of trailheads and key points.

WOW Guides Utah Canyon Country by Kathy and Craig Copeland.
Includes a broader geographic region with less depth but with more through descriptions.