Friday, October 25, 2013

Planning for the PCT in 2014

I’ve been talking about doing a long-distance trail for years.  With my job over at the end of the year, I’m finally going for it!  I will set out to hike the 2,663 mile Pacific Crest Trail (PCT) from Mexico to Canada through the Sierra Nevada and Cascades starting in April of 2014.
PCT planning (and AT practice hikes too.. pay no attention to the CDT info- not sure how that got there <grin>).
Though the Appalachian Mountains have been my stomping grounds for the past dozen years, nothing stirs my soul like the sight of the Cascade Mountains of the Pacific Northwest.  These are the mountains of my childhood, and whenever I see them, I feel a strong sense of home and of belonging.  Whenever I visit places like Crater Lake, Stehekin, or Lassen, I always wish I could stay longer.   

Never actually having done a long-distance backpacking trip, I’m excited, scared, overwhelmed, overjoyed, and most of all thrilled to be *finally* doing it. <yippee>

Stay tuned for updates on planning and training...
On a trip a few years ago with my folks to Stehekin, Washington, near the PCT.

Tuesday, October 22, 2013

2nd DIY Karo Top Quilt

Making my own gear continues to be a process that I find very fulfilling.  With the arrival of cooler weather, it was time to sew a new top quilt.  It can be a challenge designing gear without a pattern, which is why making prototypes helps the process.  My DIY summer quilt (detailed here) served as a prototype for this new winter quilt project, though it's also a completely functional piece of gear.  It was an interesting process to improve upon the earlier design and though I've only taken it out on the trail for one night, so far I love the 3-4 inches of cozy down softness.

***Update 7/16- This quilt has kept me warm in my hammock for over 2000 miles and counting. A favorite! ***
The new DIY winter top quilt
Reflections on the first design:
First I'll digress a bit about the prototype/ summer quilt.  This was my first time using a top quilt rather than a sleeping bag, and I was delighted with how much faster it was get settled into my hammock since I didn't have to mess with a zipper or all that bulk.  I'm definitely a fan of quilts!

I also initially had my doubts about the karo quilt design.  But as it turned out, the karo baffle design did a great job holding the down in place while also allowing me to shift down during use (usually to the feet, sometimes to the sides when it got too hot).  Because I started with a summer weight quilt, it required less down, so the first design only cost me $51.  Fortunately, I ended up liking the design, but I'm glad I started with more inexpensive materials.  Since it was for summer, I erred on the side of making it too small since I figured the risks were low.  I found the size of this quilt fit like a glove, saving me weight and bulk.  

While using my first karo top quilt, I brainstormed ways to improve the design for a second quilt for winter.  I knew I wanted a sewn footbox, a slightly roomier cut, and, after our season of record rainfall, moisture-resistant materials.
Strips of masking tape stabilize the baffles while sewing them.
Materials:
I was reluctant to spend a ton of money on materials, but then my folks sent me a check for my birthday.  So I immediately put in the order for my first choice of all the materials. (Thanks Mom and Dad!)

    Fabric: 5 yards of 0.67 oz/yard2 Argon fabric from Dutchware, $50 + $2 S&H
    Down:  15 oz of ARD+ DWR 850 fp from Underground Quilts, $150 +$10 S&H
    Baffles: white tulle, leftovers from previous projects.

    Total cost of materials: $200 + $12 shipping.

First the fabric.  To be honest, I got really frustrated since I couldn't just go out to a local fabric store to compare all the lightweight fabric choices that I read about (here and here).  I ended up using a new fabric called Argon that got favorable reviews on Hammock Forums (here and here).  They said it is more breathable compared to M50, but it still has a DWR coating, and is incredibly light.  Argon turned out to be nice and soft, and easy to sew.  It was more slippery than the 1.1 ripstop I used for my first quilt, but it was way more manageable than silk or satin.  Using a new (sharp) smaller needle was important, as was sewing at a slow speed and using a wide stitch.  I wouldn't hesitate to use Argon fabric again.   

I'm also trying out the new DWR treated, 850 fp down from Underground Quilts.  I made more of a mess stuffing the down since it came sewn into ripstop fabric, compared to the super-easy static free bags I got from Wilderness Logics.  Not a big deal if I'd been using the vacuum method of stuffing down instead of doing it by hand, but at least the bathtub contained everything.  Still, I was very happy to get hold of the DWR down and I'm looking forward to seeing how it performs.

Size:
My first quilt is a narrow 40 inches wide- sufficient in summer but for winter I wanted something that will cover me even if I'm sprawled out so I went with 45 inches at the top.  I know some people use draft stoppers, but I omitted them since didn't have trouble tucking the quilt around me because of the way my hammock hugs my body.

Another decision was the baffle height.  I aimed for a quilt that would be slightly lighter than my current 35-degree sleeping bag (23oz total with 8 oz of down).  So I started with a target weight of 20 oz, and from there I calculated the loft and baffle height given my dimensions.  The big advantage of a quilt in a hammock is it uses less shell material, saves the weight of the zipper, and concentrates the down up above, rather than compressing it on the sides and below.  So for a similar weight, I should get more warmth compared to the sleeping bag.  At least in theory.  Assuming I'm wearing a hat.

Finished specs:
                                 Summer quilt (shown for comparison)                New winter quilt    
    Weight:                 11.4 oz (5 oz 850 fill down)                                       19 oz (14 oz 850 fill down)                    
    Quilt size:             75" x 36" x 40" (draw cord footbox)                           70" x 36" x 45" (sewn footbox)              
    Baffle height:        1" (but ended up being about 1.5")                           2.5 to 3" (for 3-4 inches of loft)               

Summer quilt (left) and new winter quilt (right)
Footbox:
To make the sewn footbox, I used the same overall karo design as my summer quilt, expect I sewed the sides together at the bottom and added a circle of fabric at the bottom.  I cut the outer fabric longer than the inner shell to give a differential.  Then I added a circle of baffle to hold the down in place inside the footbox. I pretty much made it up as I went along and had to add a few pleates in the fabric to get everything to fit together, but overall it turned out great.

 
Final thoughts:
Making prototypes and revising designs is an integral part of the DIY process.  Thinking through the features to incorporate requires reflection on techniques and provides a deeper understanding of one's own hiking priorities.  It's especially rewarding seeing progress through all the different design versions.  If you're thinking of making your own gear- I really encourage you to give it a try- it's easy when you start with a prototype. 

For more information and inspiration for your own DIY projects:

     Check out the DIY section of Hammock Forums and the MYGO forum at Backpacking Light.

    Go on a Hammock Forums Hang- this is the place to meet a bunch of DIY'ers and creative folks.

Monday, October 21, 2013

Wilderness First Aid

This weekend I took a Wilderness First Aid (WFA) course offered through UGA's Outdoor Recreation Program. This was my third time taking WFA since certification expires ever two years.  But each time I get something new out of the experience.

I first took WFA because it was required for trip leaders for my hiking club, but its worthwhile for everyone that spends extended time in the backcountry.  

WFA teaches lay people (non-medical) to respond to injuries or illnesses that occur where help is one to several hours away.  Of course a 16 hour class can only cover basic medical techniques.  But really the most important things we learn are the decision making process and leadership skills, and how to identify life threatening injuries, stabilize the patient, and get help or get the person to safety.  The training involves a mix of lecture, discussion, and (my favorite) role-playing scenarios to practice our skills.  You'd have been surprised how serious we took the scenarios-- there was fake vomit, wounds made with magic marker, and some excellent acting (not mine!).

Another thing we learn is what questions to ask the patient, how to take vitals, and how to document the information that can be critical for the medical professionals- really helpful to know. 

There is also an emphasis on prevention- similar to what is covered under plan ahead and prepare of Leave No Trace Trainer courses.  We talked about things like ways to assess the skill levels of the group and knowing pre-existing conditions and allergies.

One piece of advice: take this class your hiking partner or coleader.  Both so you can have someone to review with, and to talk over some of the serious stuff.  It can be emotionally charged to role play what it would be like if someone were to be seriously injured on a hike.  I also found myself reviewing all the incidences and mishaps I've encountered over the years on the trail.  Nevertheless, it feels empowering to learn and review safety skills, even though I really hope I never have to use them.

For more information:

Find a WFA program in your area on the American Red Cross webpage.

What to find out what's covered in the course?  Download the pdf of the Reference Guide here.

Sunday, October 13, 2013

Holcomb Creek Trail and Rabun Bald Trail

Roadwalks.  I used to avoid them at all costs.  But lately, I've been stringing together shorter trails with road walks to give me some longer contiguous routes.  This has allowed me to explore some new trails that are only accessible by FS roads (i.e. roads I don't like driving on in my tiny car).  I've found that walking FS roads can be surprisingly pleasant, especially on Sunday mornings when there are no cars out.  And the best thing is that I can make longer backpacking routes if I use FS roads so I get to see some new terrain.

This weekend, I made a partial loop with the Bartram Trail, Rabun Bald Trail, Holcomb Creek Trail, and FS roads.  There were two waterfalls on Holcomb Creek Trail, and fabulous the fall color on Rabun Bald, Georgia's second highest peak.  
Loads of fall flowers were blooming, like this gentian.
I parked at Osage Mountain Overlook just over the NC border, and ascended Rabun Bald on the Bartram Trail.  Before descending Rabun Bald via the Rabun Bald Trail, I took a detour down the Batram Trail to check out a side trial I'd been curious about.  About a mile south of the summit, I reached signed Flint Gap, and the marked side path to Flint Knob (0.7 miles).  The trail was easy to follow, though blazes were sporadic.  Unfortunately, there were no views from Flint Knob, but at least it there was a nice rocky summit to mark the top.   It looks like the trail continues on to a residential community, so I didn't bother going any further, and instead retraced my steps back up Rabun.

After having dinner on Rabun Bald and chatting with some dayhikers, a family was setting up camp at the summit, so I decided to head down the Rabun Bald Trail to find a quieter campsite for the night.  Normally, I wouldn't set up on a ridge, but the views of the fall color were just too pretty.  Plus, I knew I'd be super warm cause I was testing out my brand new, hot off the sewing machine DIY winter karo top quilt (more on this in future posts).
Camping on the leeward side of the ridge
Fabulous sunset view.
The next morning, I continued the steep descent down Rabun Bald Trail, and took a left on the FS road.  After about 20 minutes, I hopped on the Holcomb Creek Trail.  It was sad that the large hemlocks described in the guidebook were all dead, but there were several large tulip poplars and the trail was quite nice.  Holcomb Creek Falls was impressive, and lovely Ammons Creek Falls was framed with brilliant red sourwood which made for quite a sight.
Holcomb Creek Falls.

I'm so glad I got over my aversion to road walks so I could check out some trails I hadn't done before- both Rabun Bald Trail and Holcomb Creek Trail were definite winners!
Holcomb Creek Trail.
Resources:

Trails Illustrated Map #778

Tim Homan's The Hiking Trails of North Georgia

Sunday, October 6, 2013

Arabia Mountain with the Trail Dames

Visiting the yellow daisies at Arabia Mountain has become an annual tradition.  Dramatic display of yellow flowers bloom all over this granite monadnock dome.  An abundance of unique plants adapted to the desert-like conditions are splendid in late fall.
Enjoying the yellow daisies with the wonderful Trail Dames.
I organized a day hike with Trail Dames to Arabia Mountain.  This is great hike for adventurous beginner hikers and nature enthusiasts.  Though it's accessible to Atlanta, it never feels crowded because visitors are dispersed over an extensive trail network, plus there are opportunities for off-trail navigation over open rock faces that are rare in the southeast.
Yellow daisy (also called Confederate daisy though I avoid that name, or Helianthus porteri)
Arabia Mountain is one of the few places around that has rock cairns (piles of stone) to mark the path.  Some parts of the trail were marked with blazes on the exposed rock, so it was easy to compare how much easier it is to navigate with rock cairns and how suited they are for treeless areas.  We also talked about the importance of staying on rock surfaces and treading carefully to avoid stepping on rare plants and lichen.  
Vernal pools still held water even though hasn't rained for a while.  Other depressions in the rock contained dish gardens full of rare plants that look like they could have been landscaped.
Investigating critters in a vernal pool.
Rare black-spored quillwort
If you do visit, be warned that temperatures on the exposed rocks are very extreme.  My favorite time of day to visit is very early morning to catch the soft light and cool air.  In fact, I arrived a few hours before everyone on the day of the hike so I could enjoy the loop before most people wake up.  
dew on purple milkwort
Ladies tresses, a type of orchid.

For more information and trail maps:
Arabia Mountain Nature Preserve Website

Guidebook to the plants:
Guide to the Plants of Granite Outcrops by William Murdy and Eloise Brown Carter.

Sunday, September 15, 2013

Overnight Loop on the Foothills, Winding Stair, and Big Bend Trails

Wanting to explore two trails that link to the Foothills Trail in South Carolina, I devised a 16.4 mile loop for a solo overnight on the Foothills Trail, Winding Stair Trail, and Big Bend Trails.  After section hiking the 77-mile Foothills Trail, I've been hiking all the spurs and side trails that connect to the Foothills because I love the area so much.  This loop turned out to be a very scenic, easy route with four impressive waterfalls and several unnamed smaller falls.  Even the roadwalk had a small waterfall!
Unnamed cascades along the Winding Stair Trail.
I parked at the Foothills Trail access at Cheohee Road (FS 710) right off SC 107.  If I were to do it again, parking at Nicholson Ford would have been safer, but this gave me a shorter drive.  The loop began with a 2.5 mile roadwalk down FS 710.  It was pleasant walking with views through the trees and diverse fall flowers. 

Winding Stair Trail (3.5 miles) headed up into the forest on the left after crossing Crane Creek over a bridge.  The parking area was unmarked but the trail itself was signed and adequately blazed.  This hidden gem is mostly used by dayhikers (i.e. no campsites evident).  Broad switchbacks wound gently up the hillside so the 1000 foot elevation gain was effortless.   Paths to two waterfalls required steep scrambles down rhododendron thickets, with much ducking required for tall people.  Miuka Falls was an impressive 70-foot cascade and Secret Falls was smaller but picturesque.  

After crossing SC 107, Big Bend Trail led 2.7 miles to the Chattooga River Trail/Foothills Trail.  It passed through really pretty forest, typical for the Chattooga River area, with large trees, doghobble lined streams, and mountain laurel.  Pine-needle cushioned trail made for easy walking. 
Pinesap lacks chlorophyll and gets its carbon by parasitizing fungi associated with pine trees.
Giant pines on the Big Bend Trail
Off the Foothills Trail, steep social trails through rhododendron tangles crisscrossed the riverbank overlooking Big Bend Falls.  You could feel the ground rumbling as the powerful Chattooga River thundered through narrow canyon.  I never did get a good photo, but believe me it's worth seeing (and hearing!).
Camping along the Chattooga River.
I set up camp on a sandy beach north of Rock Gorge along the Chattooga River.  After being focused on hiking and the trail, I finally had some time to think.  It was a tough week at work- I received the unexpected news that the funding for my job is ending sooner than I'd been previously told, and I'd been feeling very unsettled the past few days.  Thankfully, watching the sun set and the moon rise above the hills over the river was quite restorative.

The Chattooga River is one of those really special places for me.  I feel so at home in the forests through which it flows.  Its large evergreen trees, rhododendrons and ferns remind me of the forest of my childhood in Oregon.  I have made so many memories of trips on the trails that intersect the Chattooga- the Foothills, Bartram, and Chattooga River Trail.  It's tough thinking about leaving this place and all the friends I've made here, but it's also exciting to dream about what I'll do next. 

I woke early to hike the few miles to my car on the Foothills Trail, passing yet another falls.  It was a short trip, but exactly what I needed.
Lick Log Falls on the Foothills Trail.
For more information:

Tim Homan's Hiking Trial of the Southern Nantahala Wilderness and Chattooga River.

Trails Illustrated #778 Brasstown Bald and Chattooga River

Tuesday, September 10, 2013

On the JMT... of Tennessee

I couldn't help boasting about this trip, "This weekend, I'm backpacking the JMT… of Tennessee!"
The John Muir National Recreation Trail goes 20 miles along the Hiawassee River gorge in eastern Tennessee.  John Muir traveled this route on his long walk from Kentucky to the Gulf of Mexico, and Muir's description  (see here- read under Sept 19) of the incredible river still aptly describes the wonder of this river today.  
Water levels were low enough to exposed the unique jagged rock formations of the Hiawassee River.
My friend Salt and I began at the western end at Childers Creek trailhead, and we highly recommend the scenic first 3 miles to Big Bend.  It's well maintained and follows the northern bank of the Hiawassee River below towering bluffs.  The Benton Mackaye Trail Section 13 is concurrent with this part of the JMT.  
Fascinating geology and diverse plant community including pawpaws, one of my favorites.
Past Big Bend Parking Area, Hiawassee River Road is popular with fishermen, and there are frequent parking areas and boat launches with trashcans, picnic tables, and bathrooms.  The area (especially the nearby Ocoee River) is also a mecca for whitewater rafting and kayaking, and we wondered a few times why were hiking rather than staying cool in the water like the fishermen and boaters.
Joe pye weed along the Hiawassee River.
Lunch at one of the many picnic areas along Hiawassee River Road.
From Big Bend to Towee Creek, the trail left the river and ascended a very short distance up the hillside.  We stayed within sight of the road so it was pretty much like walking along road, only rougher and more difficult.  I'm not sure point of this but it did take us to an overlook along some rock formations.

The 2008 reroute between Towee Creek and Wildcat Creek led further away from the river and up over a tall bluff.  We followed beautiful Towee Creek before switchbacking up to the spine of the ridge.  It was a hot humid climb and we were dripping in sweat.  Afterwards we joked that we'd bagged a 14er.  Such bad-ass JMT hikers!  Of course it was only a 14-hundered footer, but whatever...
It was hard going.  Gnats were especially vicious and kept flying into nose, eyes, and ears. 
Our original plan had been to camp at Coker Creek, but the heat and mugginess had sapped so much energy that we decided not to go any further.  Hammocks were hung above a bluff over Wildcat Creek.  We had dinner under a rocky overhang, and soaked tired feet in the river while swatting (unsuccessfully) at the blood-thirsty no-see-ums.

In the morning, we decided to follow the old route of the JMT/BMT on the return trip to the car.  The section was much more used and still marked with signs and blazes all the way to the suspension bridge over the Hiwassee River and the Apalachian Power House.
Walking along the old route (rather than the reroute) provided lovely views of the river.  There were fishermen out all along this peaceful stretch of water.
The old trail markers showed where the old route used to veer off the road into dense forest along the riverbanks.  We followed the blazes through really overgrown trail and eventually got tired of fighting the thick brush.  We suspect other hikers also must walk the road which was much more pleasant.  Though I wonder how many people hike this stretch- we certainly didn't see any other backpackers, just one dayhiker, and lots of fishermen.
Overgrown section.
Just before we got back to the trailhead, as I was strolling along looking up at the pawpaw, Salt shouted something from behind me.
Looking up at the tons of pawpaws all along the trail.
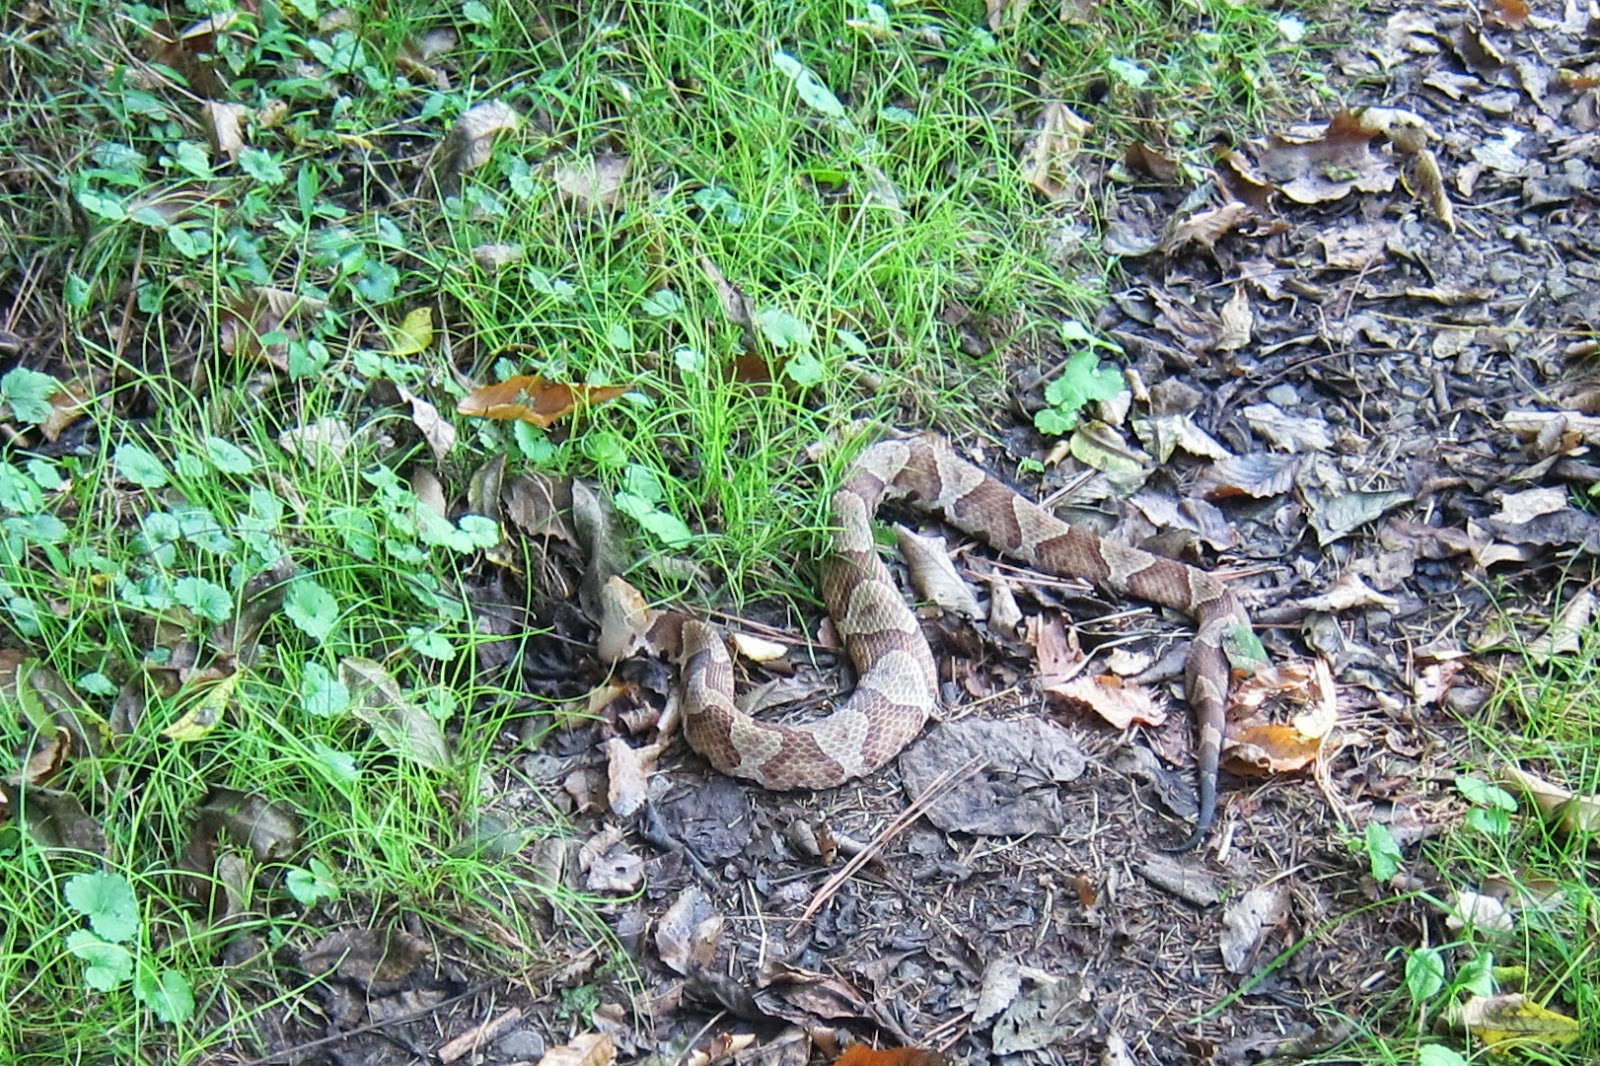
I walked a few steps further before turning around.  She exclaimed that I'd stepped on a snake!   Sure enough there was a copperhead in the path looking very angry. 
Anyway, she saw the snake move when I stepped on it, but it didn't bother me, not even a nibble.  And he looked to be still very alive.  Ironically, she'd just been talking about seeing a snake and how snakes are reported to be common along this section of trail.  I've since read that copperhead bites are really rare, that they only inject venom half the time anyway, and thought it's painful, hardly ever deadly.  Not that I'd ever step on one on purpose, but it's another thing that I'm not gonna fear.

Overall, the first few miles of the JMT from Childers Creek were exceptionally pretty and I think they'd make a fantastic day hike, especially in fall or winter when the weather wouldn't be so brutally hot.  It was great to be on the trail with my friend Salt and on the way home we scouted out the next trailhead for the BMT so I'll look forward to returning to this area for more adventures.

Information and trip planning notes
(note: information on the John Muir National Recreation Trail was really disappointing and lacking so I've included an annotated description of resources.)

Sherpa Guides has some regional information here.

The BMT Trail Guide for Tennesse showed the old and new reroute, which was helpful.  However, it wasn't as detailed about the confusing road crossings.

The Trails Illustrated map #781 Tellico and Ocoee Rivers is easier to read than the trail guide, and shows road access.  However, it didn't show the old BMT route, even though both new and old routes are still signed and blazed.  Potentially very confusing.

This Backpacker Magazine article on the JMT at least had directions to the trailheads and for the shuttle.  However, it doesn't describe the reroute even though it was published in 2010, and the description made us wonder if the author had actually hiked the trail.

Unfortunately, the BMTA trail descriptions that had been so helpful for sections 1-11 are not available for this section, but a map is available for free download.